I’m often asked by clients and other photographers about the technical side of what I do. I’ve decided to share some of the most common questions about the equipment and tools that are a part of my everyday life and work. It’s important not to forget that they are only tools- Photoshop and expensive equipment don’t equal great photography! In the right hands though, all this wonderful technology offers almost unlimited artistic freedom. With that, I hope you find this q&a useful. Enjoy!
How do you typically retouch your photos?
Digital photography changed the way that many photographers think about editing. It has made it possible to change images in unlimited and drastic ways, which gives a lot of extra creative control to a photographer. My style is simple, so I try to keep my images that way too – without going overboard with retouching. For me, retouching should be subtle and not overbearing. When it’s done right, it helps me make my photos more beautiful, simple and artistic.
Along with the convenience factor, there are a million programs and tools out there to help you change every little detail in your photos. Most photographers have Photoshop, but probably only use one or two tools in the whole program! Retouching can be overwhelming for people new to the field, with so many different ways to do the same thing. I like to think of the open ended approach to editing as an opportunity to get even more creative with my art. Usually the photos look great straight out of the camera, but it’s a challenge to turn great photos into something even better. With a little extra consideration to detail, color, shadow- great photos can become amazing photos that couples love to show off and will cherish for years. I hope! :-)
My workflow begins by importing all the photos of the day into Adobe Lightroom. After a busy day of shooting, especially a wedding, this can easily add up to a couple thousand photos! To make the editing process easier, I start by “flagging” all my favorites to mark all the best photos of the day. Now that I know which photos I’ll be using, I will review them one more time and color-code the ones that will be sent to photoshop for more intense retouching. It’s very important to develop a consistent system of organizing for your workflow. That way you’ll know where to find originals, retouched, blog versions, etc for all your photos.
I like to adjust every single image in Lightroom for the best brightness, contrast, color balance, saturation and sharpness. Working on these minor details really helps to transform each individual image into a unique work of art. There’s also a variety of handy tools to change photos to black and white, sepia, and many other amazing color filters. I enjoy working on images and trying to bring out the story and emotion of the day. Afterwards, I do another filtering to decide which images will be worked on even further in Photoshop.
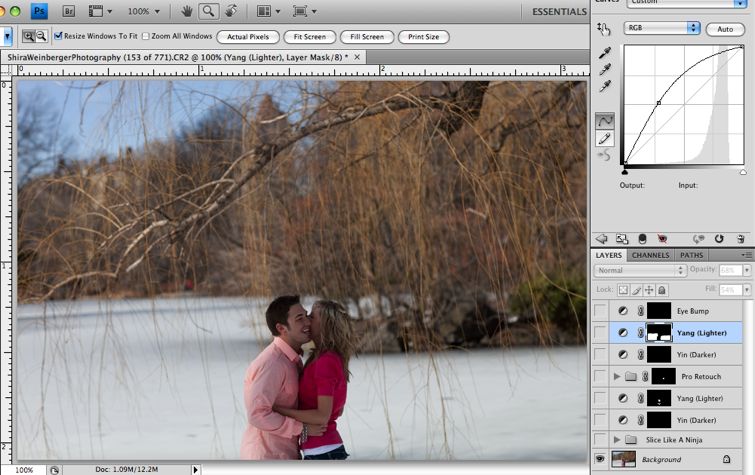

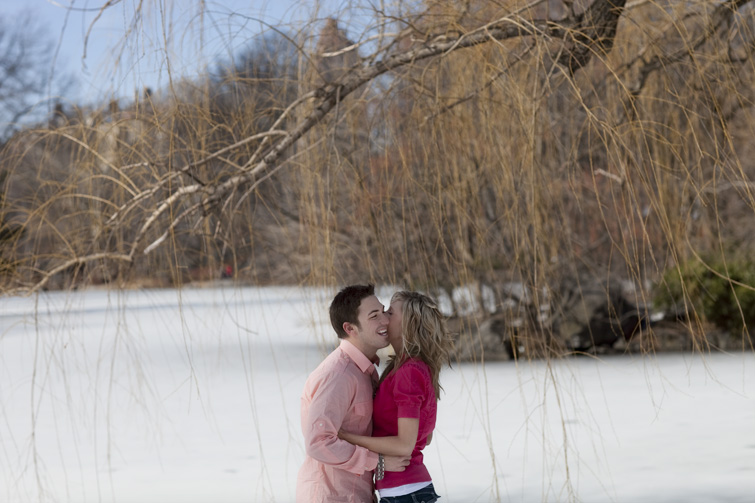
For more advanced retouching, I use an incredible set of tools for called Totally Rad Actions. TRA makes it easy to improve photos without making them look retouched. With time and effort in post processing, bright colors pop, subjects stand out sharp against the background and skin looks super soft and natural. For the photo above, I used some of my favorite functions. Pro Retouch to make skin soft, Yin & Yang to paint brightness on the snow, and Slice Like a Ninja to selectively sharpen the photos and make the subject stand out in better focus.
After intense retouching in photoshop, I reimport them back to lightroom for the final edit. Finally, as I said before, it’s important to categorize your photos so you can find them later!
![]()
What equipment do you use on the job?
I shoot exclusively with high-end digital photography equipment. With the right lenses and equipment as tools, I can capture important moments spontaneously and control the important elements of each image. My primary camera bodies are two Canon EOS 5D Mark II, which captures some of the most stunning photos available on the digital market today. I like to be prepared and up-to-date with the best equipment available. My current carry-along list looks like this:
![]() (2x) EOS 5D Mark II
(2x) EOS 5D Mark II![]() Speedlite 580 EX II Flash
Speedlite 580 EX II Flash![]() EF 24-70mm f/2.8L
EF 24-70mm f/2.8L![]() EF 85mm f/1.2
EF 85mm f/1.2![]() EF 50mm f/1.2
EF 50mm f/1.2![]() EF 70-200mm f/2.8 IS
EF 70-200mm f/2.8 IS![]() 100mm f/2.8 Macro
100mm f/2.8 Macro![]() 45mm f/2.8 Tilt Shift
45mm f/2.8 Tilt Shift![]()
![]() Pocket Wizard
Pocket Wizard![]()
![]() Litepanel Micro LED video light
Litepanel Micro LED video light![]()
![]() Sunpak Readylite 20
Sunpak Readylite 20
![]()
Q: How do you get that dramatic point of view blur effect in some of your photos?
To create shots with an exaggerated depth-of-field, I use an adjustable lens called a ’tilt-shift.’ There are ways to achieve this blurred effect in Photoshop but I like to avoid using them because they tend to look very fake. The aperture effect created by an optical lens is always preferable to a filter added in post-processing.
![]()
The secret to tilt-shift is a confusing geometric rule called the Scheimpflug Principle, which has to do with optics and focus. Basically, the lens tilts diagonally with the sensor in the camera, leaving the subject of the photo in crisp, perfect focus. The other part of the photo then looks like a soft, distant blur. It creates a fun, dramatic effect that I love to get creative with.
![]()
![]()
The lenses were originally manufactured to photograph architecture, and then later discovered as a useful tool in making miniature models look life size. It’s so much fun to use the same principles to photograph couples, really make them stand out against the background, and make the emotion in a photo larger than life. For a comprehensive explanation of tilt-shift optics, I recommend this article: Using Tilt-Shift Lenses to Control Depth of Field.
by admin